
Introduction
At Nstproxy, we’re committed to making proxy integration seamless with all major browsers and automation tools. In this tutorial, we’ll show you how to integrate Nstproxy proxies with Morelogin — a leading anti-detect browser designed for secure multi-account operations.
If you’re managing e-commerce stores, social accounts, or marketing campaigns, this setup ensures high privacy, zero detection, and consistent success.
Step 1: Prepare Your Nstproxy Credentials
Log in to your Nstproxy Dashboard and generate your proxy line. You can choose residential or datacenter proxies depending on your use case.
Example:
D3B153E4F8170622-residential-country_US-r_30m-s_abc123:password@gw-us.nstproxy.io:24125
Step 2: Open Morelogin
-
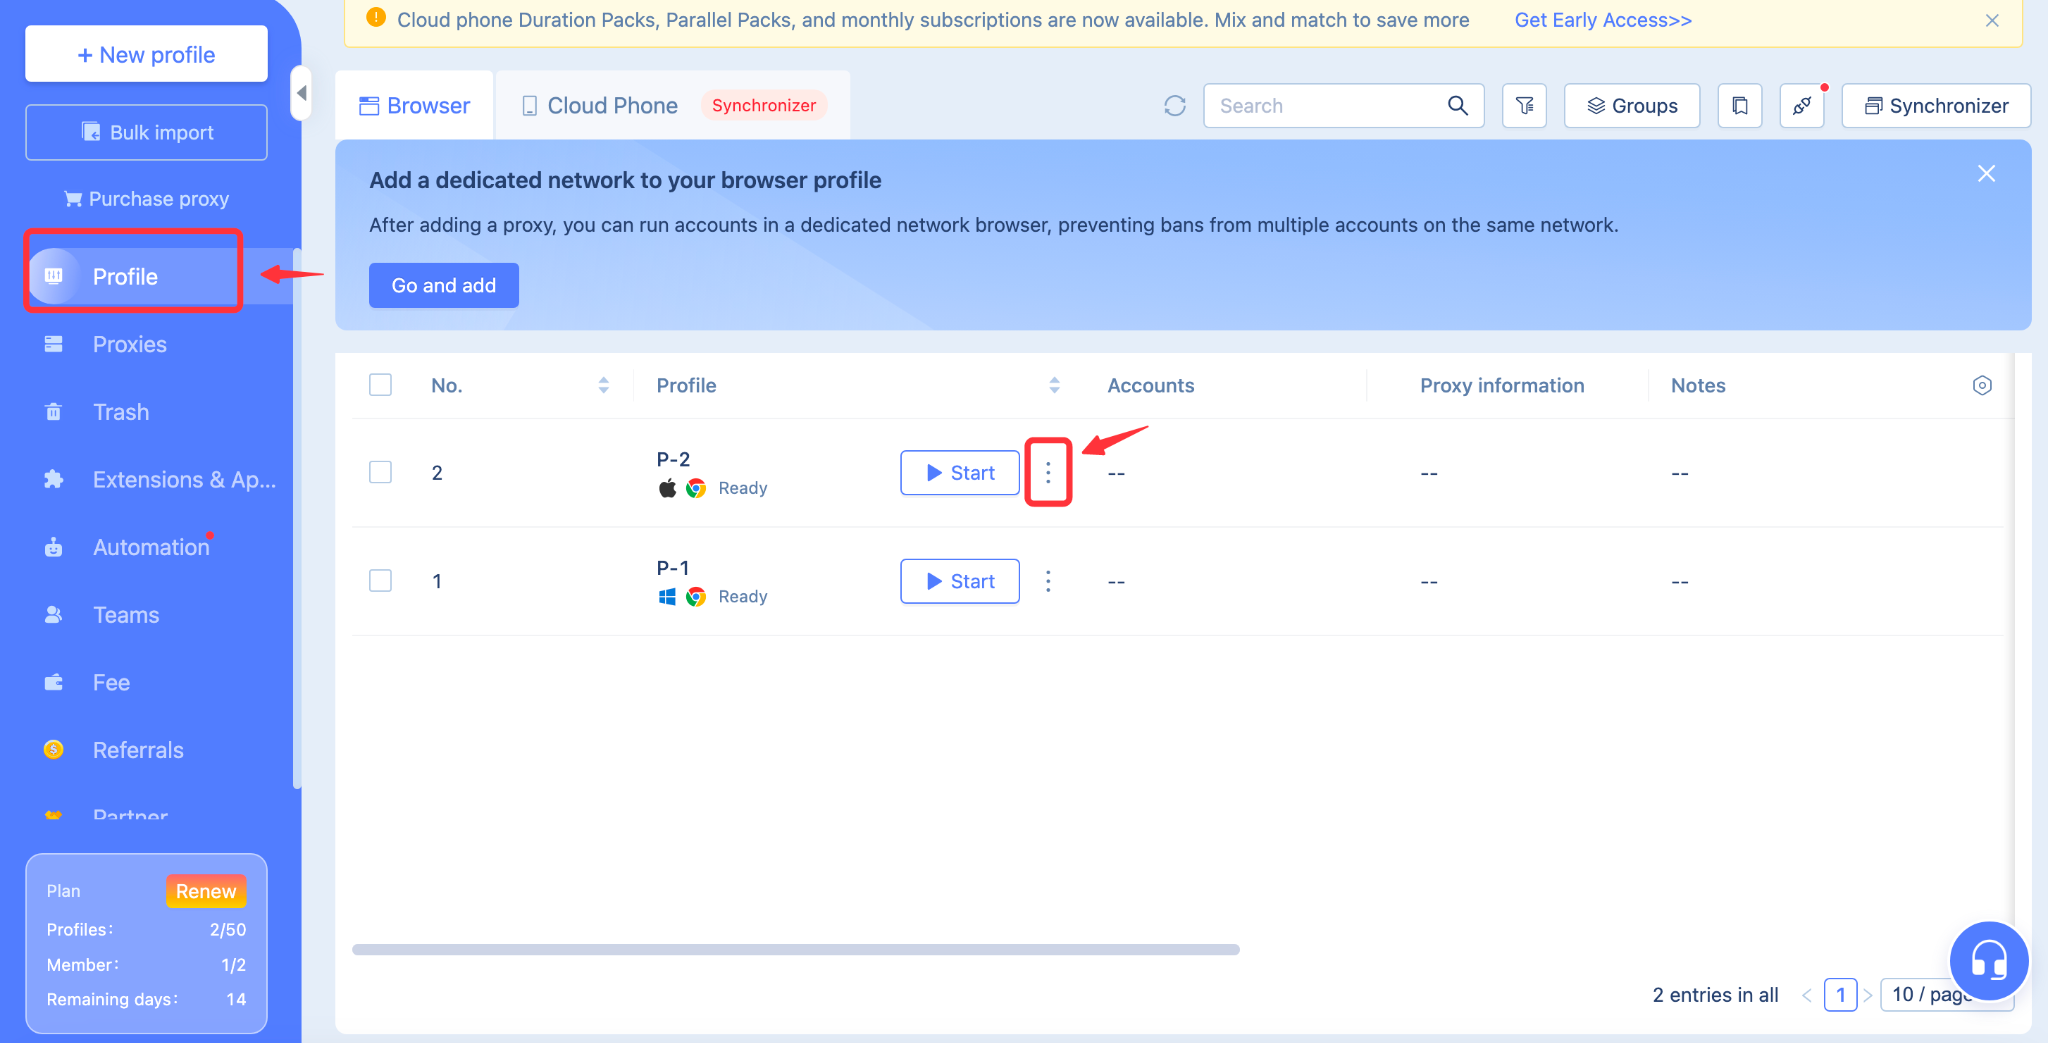
Launch your Morelogin application.
-
Click “New Profile” or open an existing one.
-
Scroll to the Proxy Settings section.
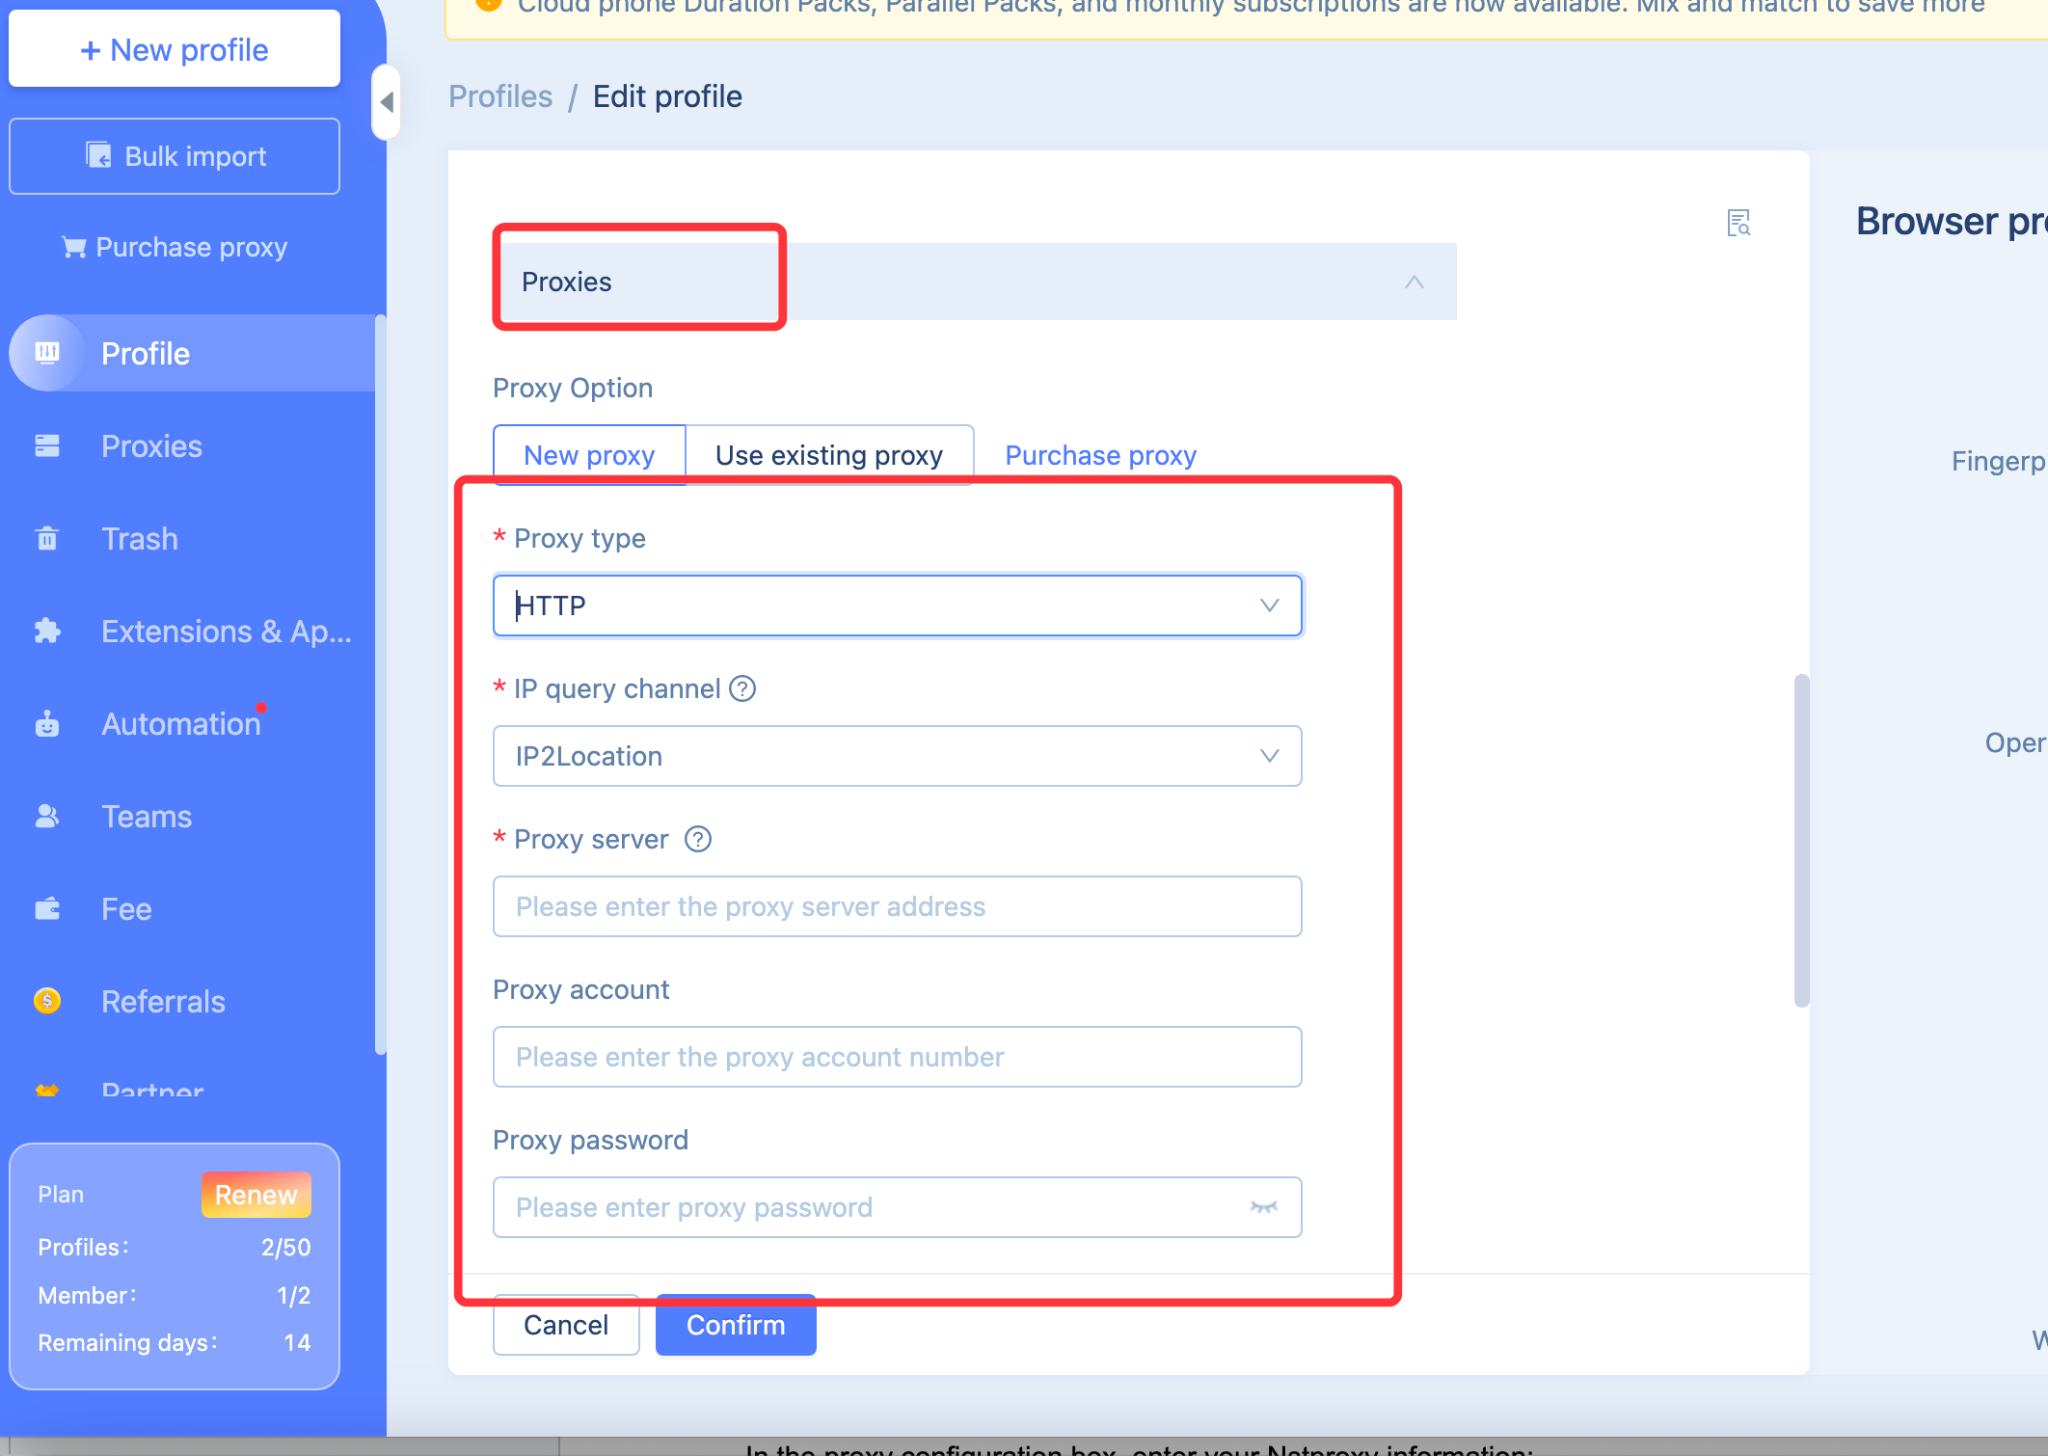
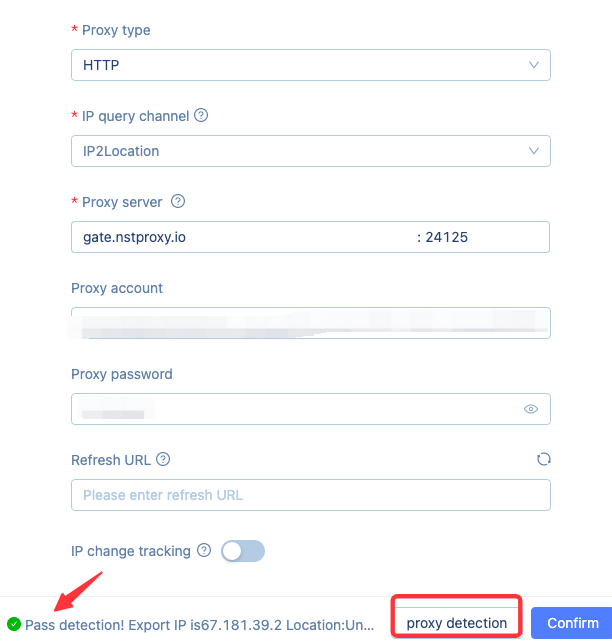
Step 3: Add Nstproxy Details
Select HTTP or SOCKS5 depending on your proxy type, then enter:
Host: gw.nstproxy.io
Port: 24125
Username: your_nstproxy_username
Password: your_nstproxy_password